How to Restore a Vintage Tractor: A Complete Guide

Restoring a vintage tractor is a noble endeavour for anyone interested in old farming machinery, mechanics, or history of farming equipment. As you stand in front of your old family tractor or a newly obtained machine saying, I want to refurbish a vintage tractor is a noble task that should be done with enthusiasm, hard work, and amazing determination.
This guide will guide you through the process of restoring a classic tractor right from assessment to the final works. Let’s get started!
Step 1: Assessing the Condition of Your Tractor
It is the first step, and an important one at that, to determine the state of the vintage tractor. It is important that the first step involves the assessment of the entire machine before ascertaining what extent of restoration is needed.
You will have to decide between having to massively overhaul the tractor to its original condition or only to fix it up a little.
Key Areas to Assess
- Engine Condition: Inspect the engine part for signs of rust, signs of leakage or any signs of surface wear and tear. Do not forget to search for missing parts, while trying to start the car’s engine.
- Transmission and Gearbox: Check the operations of the transmission as well. Anytime you hear any grinding sound or feel that the gears are hard to shift, you know that the transmission is failing.
- Electrical System: Look at the wiring, ignition and the lights. There are normally small-scale damages in most old tractors that will need repairing of old wiring if the tractors have not been used for a long time.
- Hydraulic System: In case your tractor has a hydraulic system, ensure you inspect for leaks or damaged hydraulic hoses.
- Tires: This will usually show some signs of wear on the tyres such as there being cracks, blunt areas known as flats or even if they are bald. These will more often than not require replacement.
- Body and Frame: Additionally, you should take a look one more time at the body work for signs or rust or corrosion and the frame for other delaminations such as cracks.
Step 2: Gathering Tools and Supplies
Before diving into the restoration, make sure you have all the necessary tools and supplies. Here’s a list of items you might need:
- Basic Hand Tools: Wrenches, screwdrivers, pliers, and socket sets
- Power Tools: Drill, angle grinder, and impact wrench
- Lifting Equipment: Hydraulic jack, jack stands, and a hoist to help lift heavier parts
- Sandblaster: For removing rust and old paint
- Paint and Primer: Quality automotive paint for a professional finish
- Lubricants and Grease: For various moving parts and joints
- Replacement Parts: Including spark plugs, filters, hoses, gaskets, and other essentials
Step 3: Disassembly
Disassembling the tractor is one of the most time-consuming but essential stages of restoration. Carefully take apart the tractor, ensuring you keep track of all the bolts, nuts, and small parts.
Tips for Disassembly
- Take Photos: Document each step of the disassembly process with photographs. This will help when reassembling the tractor.
- Label Parts: Use labels or bags to keep similar parts together and identify them easily.
- Remove Rusted Bolts Carefully: Apply penetrating oil to any rusted bolts before attempting removal to avoid snapping them.
Step 4: Cleaning and Repairing Parts
Once the tractor is disassembled, start cleaning each component thoroughly. This includes removing dirt, grime, oil, and rust from parts. A sandblaster or wire brush can be very helpful for cleaning stubborn rust.
Engine Overhaul
For many vintage tractors, the engine will require an overhaul. Here are some key steps:
- Inspect Pistons and Cylinders: Check for scoring or damage. If needed, replace or recondition pistons and cylinders.
- Replace Gaskets and Seals: Over time, gaskets become brittle and start leaking. Replace all engine gaskets to prevent leaks.
- Check the Carburetor: Clean and rebuild the carburetor to ensure smooth fuel delivery.
Bodywork Restoration
Bodywork is essential to restoring a vintage tractor to its former glory:
- Remove Rust: Use a sandblaster or angle grinder with a wire wheel to remove rust from panels and the frame.
- Repair Dents: Use body filler to repair small dents and imperfections. Sand the surface smooth afterward.
- Priming and Painting: Apply a primer to all metal surfaces to prevent future rust. Then, paint the tractor using an appropriate automotive-grade paint to give it a fresh, shiny appearance.
Step 5: Reassembling the Tractor
After cleaning, repairing, or replacing the individual parts, it’s time to reassemble the tractor. Follow the steps you documented during disassembly to make sure every part is returned to its correct position.
Important Considerations
- Lubrication: Apply grease and oil to all necessary parts during reassembly to ensure smooth operation.
- Tighten Bolts Properly: Ensure that all bolts are tightened to the correct torque specification to prevent any parts from loosening during operation.
- Install New Wiring: Replace old wiring with new wires to ensure a reliable electrical system.
Step 6: Testing and Troubleshooting
Once the tractor has been reassembled, it’s time for a test run. Start the engine and let it idle for a few minutes while observing for any unusual noises, leaks, or other problems.
Checklist for Testing
- Check Fluid Levels: Ensure that all fluid levels, such as oil, coolant, and transmission fluid, are correct.
- Test the Brakes and Steering: Make sure that the brakes are functioning properly and that the steering feels responsive.
- Monitor Engine Temperature: Make sure the engine maintains a consistent temperature, without overheating.
If any issues are detected during testing, address them immediately to ensure the tractor operates smoothly and safely.
Maintenance Tips for Your Restored Vintage Tractor
To keep your vintage tractor in good condition, routine maintenance is crucial. Here are some tips to keep it running smoothly:
1. Regular Fluid Changes
Change the oil, transmission fluid, and hydraulic fluids regularly to keep all systems functioning efficiently. Using high-quality fluids will help prolong the life of your tractor.
2. Grease Moving Parts
Ensure that all moving parts are properly greased, especially the PTO shaft, steering linkages, and wheel bearings.
3. Inspect Belts and Hoses
Inspect belts and hoses regularly for signs of wear and replace them as needed. Vintage tractors can develop cracks in rubber components over time.
4. Store Properly
Store your vintage tractor in a dry place, preferably indoors, to protect it from weather damage. Covering it with a heavy-duty tarp will also help keep dust and moisture away.
Popular Vintage Tractor Models to Restore
Here are some popular vintage tractor models that are worth restoring due to their history, availability of parts, and collector interest:
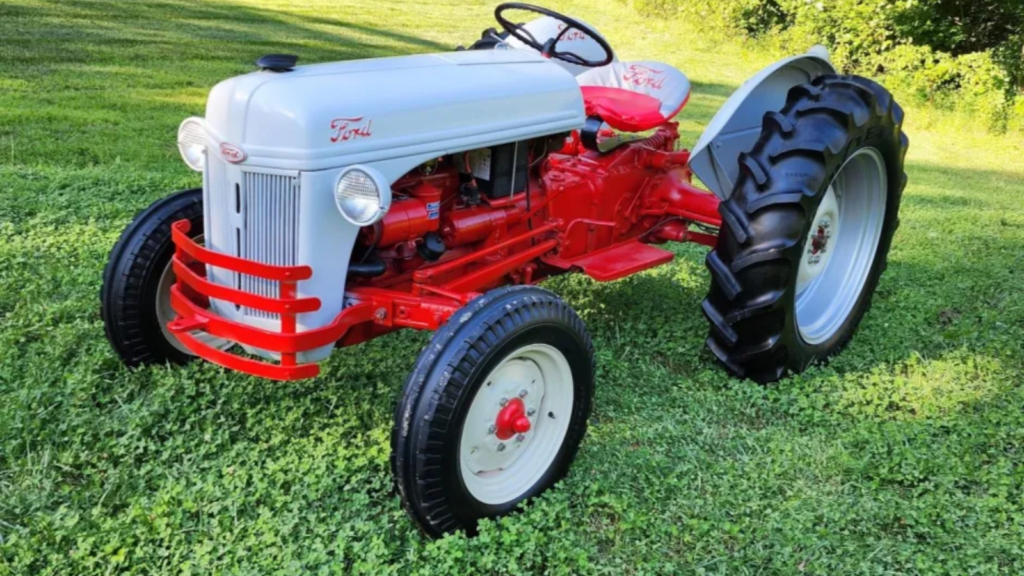
1. Ford 8N

- Features: The Ford 8N is known for its ruggedness and reliability. It was one of the most popular tractors of its time and still has a large following.
- Benefits: Easily available parts, simple mechanical structure, and a reliable design make it ideal for restoration.
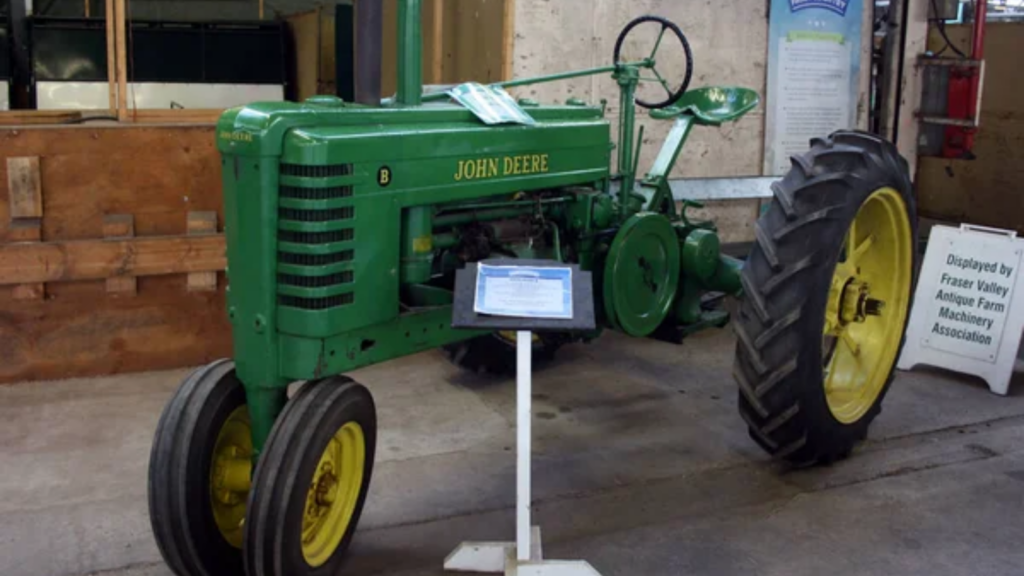
2. John Deere Model A

- Features: The John Deere Model A is a classic in the world of agriculture. It features a two-cylinder engine and simple yet robust construction.
- Benefits: High collector value, easy-to-source parts, and its iconic green and yellow look make it a favorite among restorers.
3. Massey Ferguson 35

- Features: The Massey Ferguson 35 offers a more modern design, with a three-cylinder engine that provides more power compared to earlier models.
- Benefits: Its versatility and durability make it a great choice for both restoration and functional use on small farms.
Conclusion
Restoring a vintage tractor is an enjoyable and satisfying project that requires careful planning, patience, and attention to detail. By assessing the condition, disassembling, cleaning, repairing, reassembling, and finally testing your tractor, you can bring a piece of farming history back to life.
Not only does restoring a tractor provide a sense of accomplishment, but it also preserves a part of agricultural heritage that can be shared with future generations.
Whether you’re restoring a Ford 8N or a John Deere Model A, the key is to approach the project step-by-step and never rush the process. With proper care and attention, your vintage tractor will be ready to roll once again, either as a showpiece or a functional machine on the farm.
